Several years ago I began acoustically treating my studio for recording drums and mixing. I did some research and pricing; it didn't take a spreadsheet to discover that acoustic paneling was both overpriced and hideous. I searched some more and devised a solution that was both economical and classy.
Acoustic paneling is simple stuff. You get some kind of absorbent material, optionally covered with sonically neutral fabric, and hang it on a surface. You can use spacers to increase the gap between the wall and the panel to increase the amount of absorbency, and of course your choice in material will affect the frequency range, amount of reduction, and all that. Let's skip the science though and get right into the implementation.
You will need:
- An Absorbent Material
- 1"; x 3"; boards
- 1"; x 2"; boards
- Fabric (see below)
- Nail or screw gun
- Stapler
- Dry wall fasteners (wing nut style)
First, select an absorbent material. You could go simple and use the pink stuff. You know, the insulation they sell at Home Depot with the panther on it. Good 'ol R-30. This material is fine and all, but from the perspective of space it is far from ideal. It's bulky, and in a space as confined as mine I wanted something that wasn't going to shrink my studio by more than a few square feet. I went with Owens-Corning 703 but you've got some other options, like Roxul RHT 80, which is much cheaper.
The material I bought comes in 24"; x 48"; x 2"; by default, but can be cut smaller using a razor blade. Wear gloves and long sleeves if you decide to cut it, unless you like that itchy feeling. I went the lazy route and planned my room sans cutting.
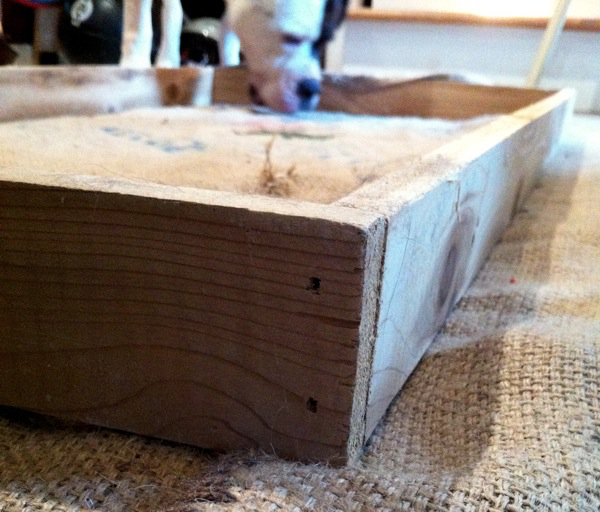
The next step was to build a frame to contain the panel. Sure, you could just duct tape it to the wall, but a frame gives it a cleaner look and allows you to space the panel away from the wall. The frame also gives you something to attach the fabric to. I used 1"; x 3"; cedar boards because they're extremely light and inexpensive, and the panels fit perfectly in them. No need to get fancy with dovetail joints and wood glue, just cut some straight boards and join them together with a nail gun, stapler, screws, or whatever you have laying around. You're dog might casually sniff your frame:
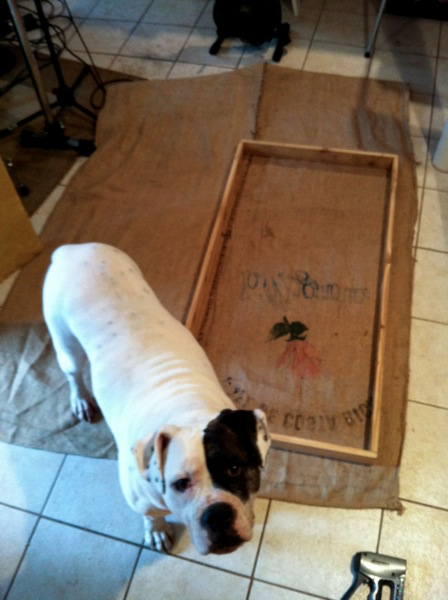
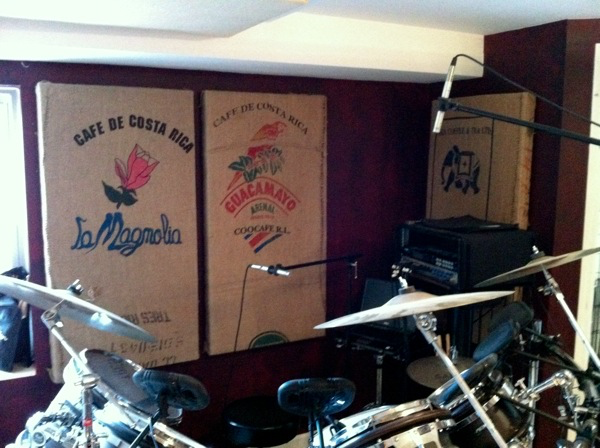
After your frame is built, you'll want to attach your fabric. You have a lot of freedom here to dress these panels up, so long as you choose a fabric that will allow most or all sound through. Many tight weave fabrics will reflect frequencies preventing them from even reaching your absorbent material, which kind of defeats the purpose. I went with coffee sacks since I had a ready supply of them, they're sonically neutral, and I think they look cool. Your dog might question your selection:
 **
**
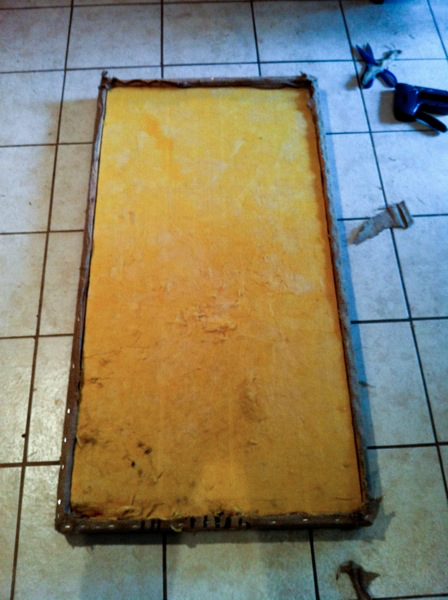
Using a staple gun or a fastener of some kind, stretch the fabric across the front of the frame and staple each side. You're probably not going to learn to be an upholsterer here, but try to get a drum-tight frame across the front of the panel, leaving the back open. After you've stapled the fabric around the frame, stuff the panel into the it. Eventually your dog will get tired of whatever it is you're doing an leave.

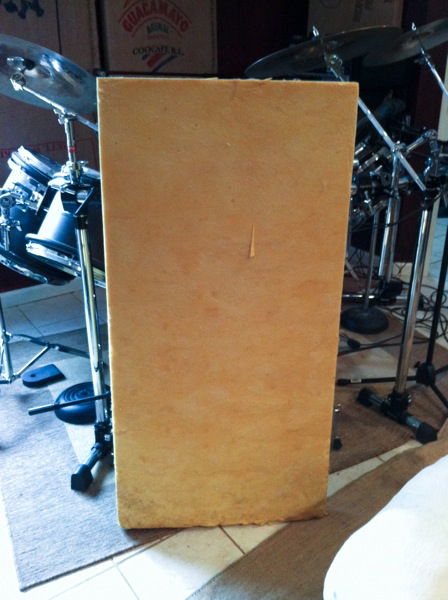
Your panel should look something like this:
And it probably looks something like this from the front:

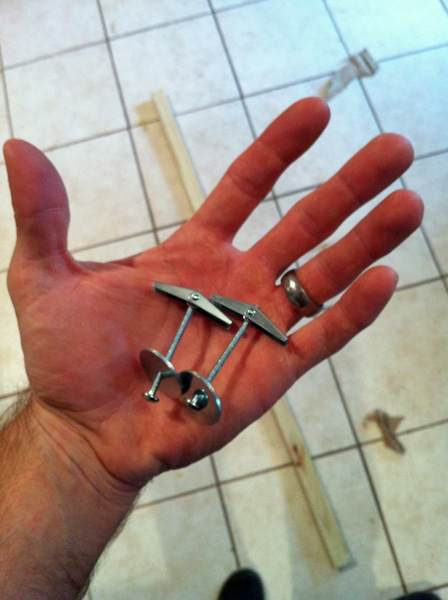
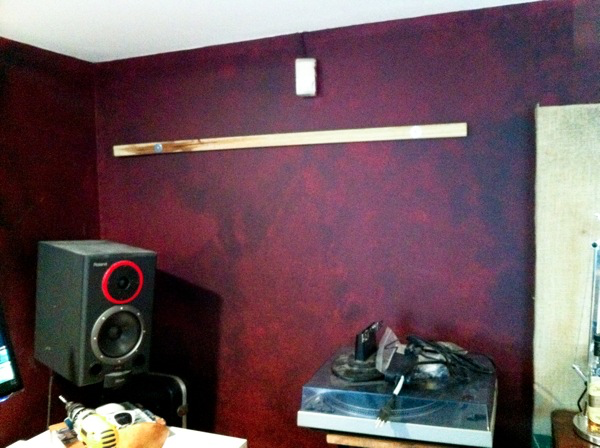
Technically you could build a stand or mount of some kind and move this around wherever you wanted, but I opted to hang mine from the walls (and ceiling). I used 1"; x 2"; boards to hang all of my panels. A 1"; x 2"; attached flat to the wall provides a 3/4"; standoff between the wall and your panel when you hang it. First, I cut 2 1"; x 2"; boards just long enough to fit inside the back of my frames. Then, I drilled two holes and inserted a bolt appropriately sized for these wing nuts:
From there it is a simple matter of hanging the standoff wherever you want your panels to hang. Mark your holes on the wall, drill where the marks are, press the bolts (already attached to the 1"; x 2";), then tighten:
Take your panel and hang it on the 1"; x 2";. You can attach, with screws or nails, the panel to the 1"; x 2";, but I find it unnecessary. Plus if you leave them free hanging you can move them around if you get bored with the way they look.
That's pretty much it. I realized that this wasn't particularly novel when I realized that this guy did almost the same thing independently, but I think the coffee sacks were a nice touch.
Oh…and ATS Acoustics offers their own coffee sack acoustic panels…for a price.